Easy Homemade S'mores Ice Cream: No Campfire Required
There’s an undeniable magic in the classic s'more – that perfect combination of toasted marshmallow, melty chocolate, and crisp graham cracker, often enjoyed under a starry sky by a crackling fire. It's a taste of childhood, summer nights, and simple pleasures. But what if you could capture all that nostalgic goodness in a creamy, dreamy scoop, anytime you crave it, without the smoke, the sticky fingers, or the need for a campfire? You can, with this incredible smores ice cream recipe!
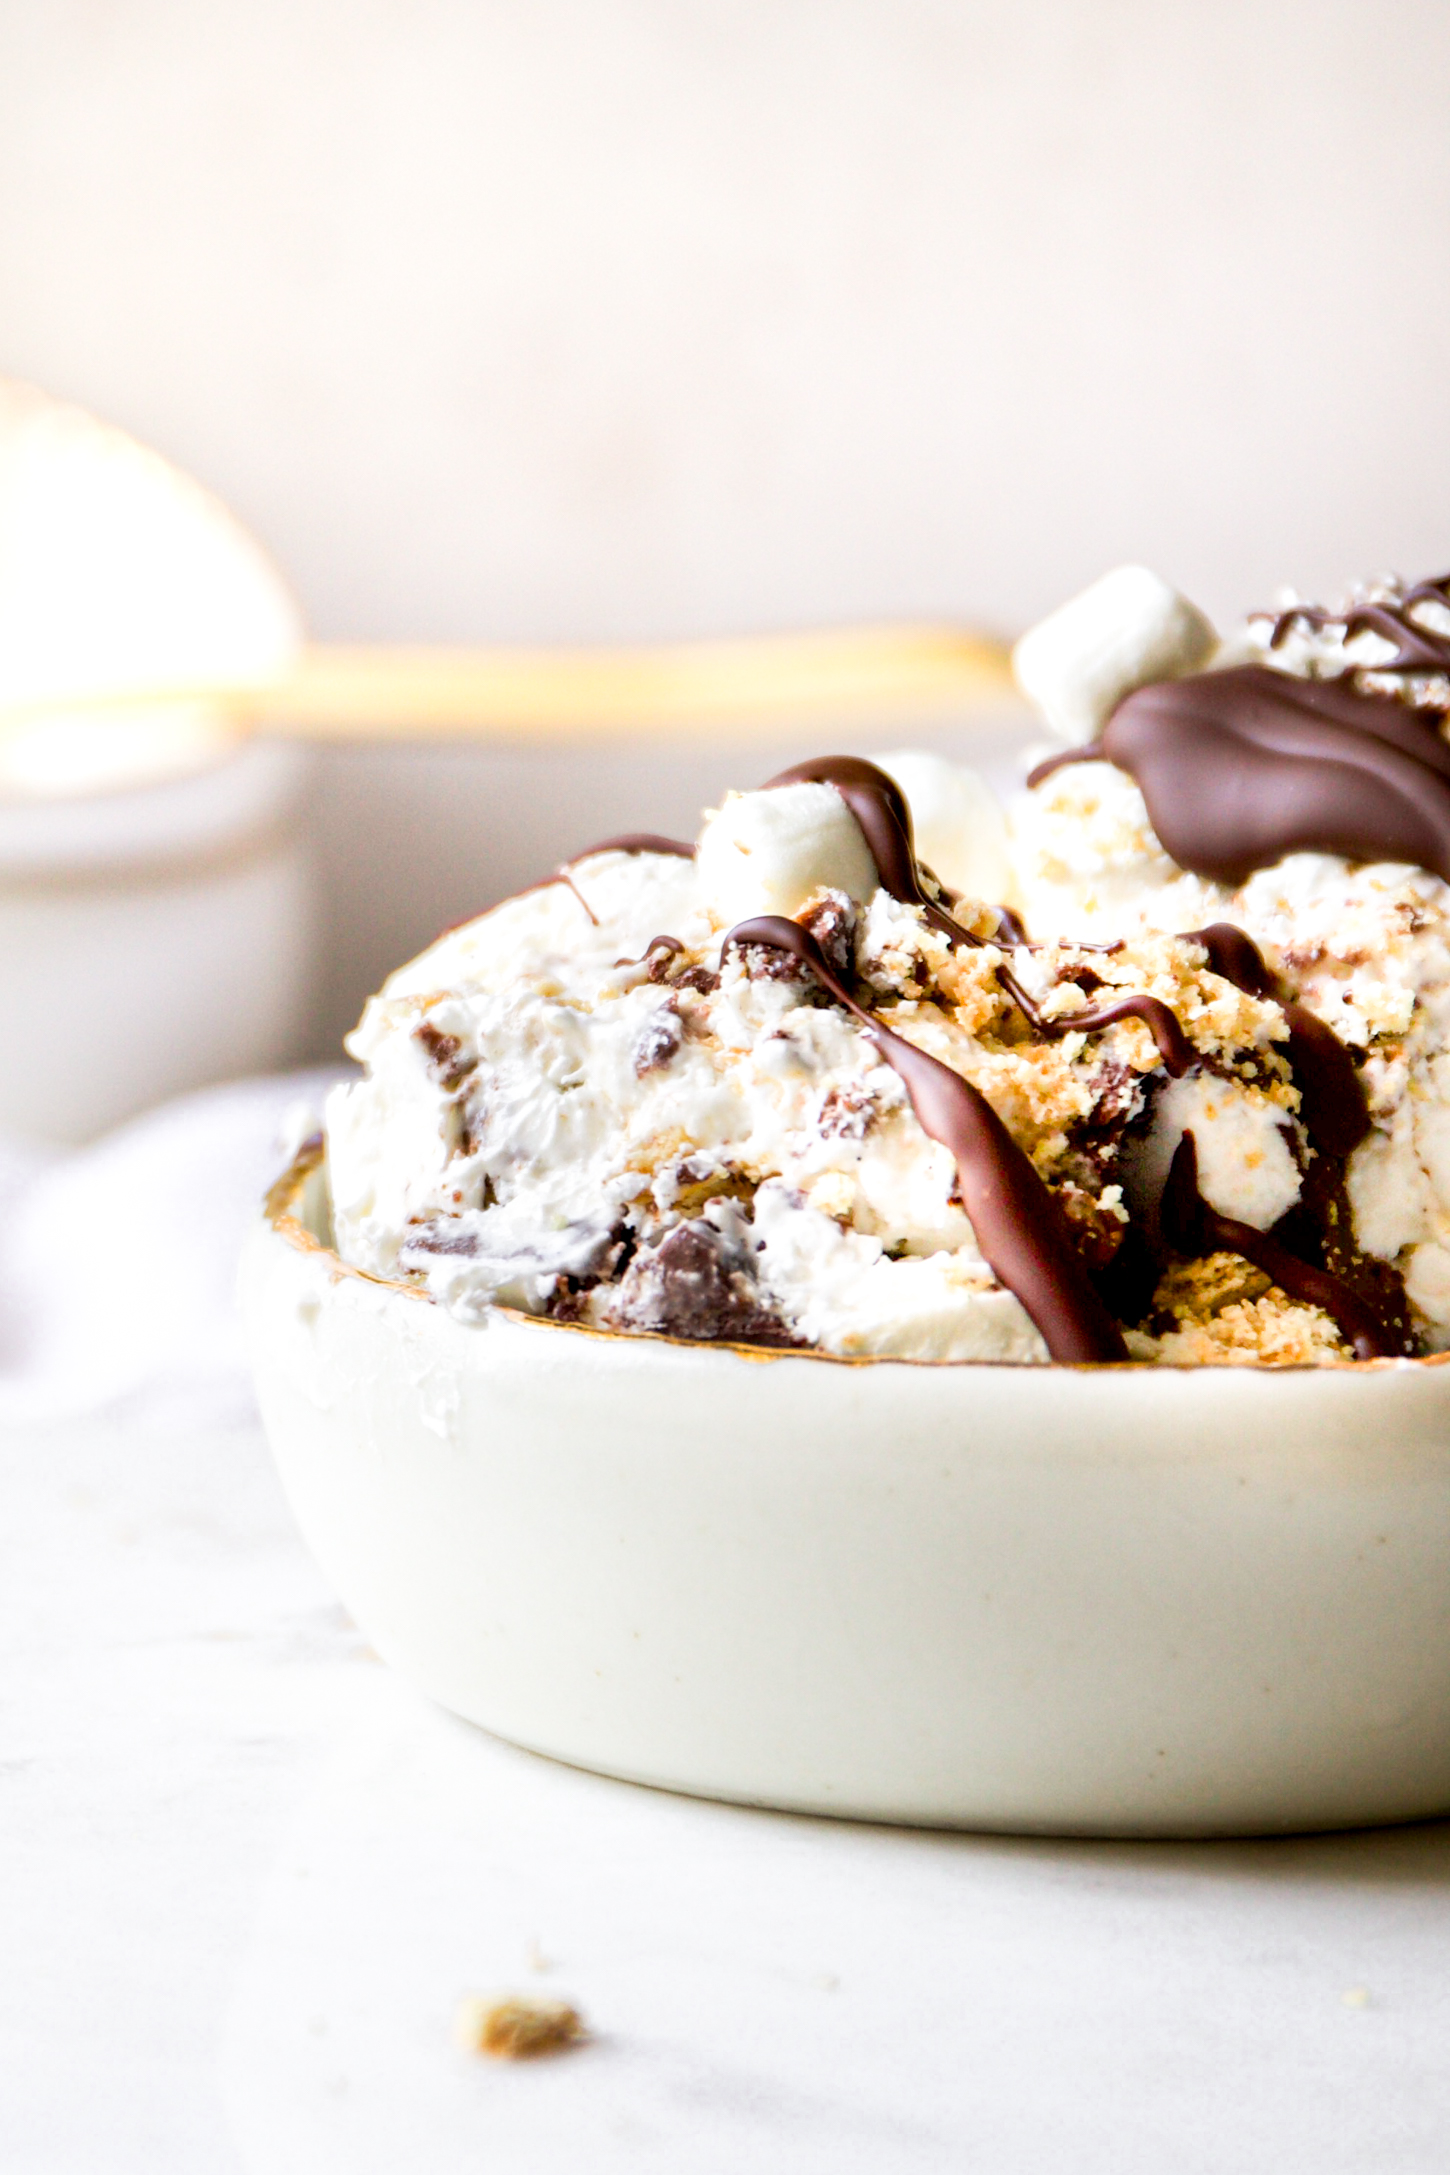
This Magical S'mores Ice Cream: Make It in Just 4 Hours transforms those beloved campfire flavors into a sophisticated yet playful dessert. Imagine rich vanilla ice cream swirled with ribbons of gooey marshmallow, generous chunks of dark or milk chocolate, and crunchy graham cracker pieces. It’s all the joy of a s’more, elevated and served chilled. Whether it’s a scorching summer day or a cozy evening when you’re dreaming of warmer weather, this homemade treat is your ticket to instant happiness. And the best part? It's surprisingly easy to make, even for first-time ice cream makers.
Why You'll Fall in Love with This S'mores Ice Cream Recipe
This isn't just another ice cream; it's an experience. Here's why this particular smores ice cream recipe is destined to become your new go-to:
- All the S'mores Flavor, Zero Campfire Hassle: Forget about finding the perfect stick, battling the smoke, or dealing with burnt marshmallows. This recipe delivers that iconic taste without any of the outdoor fuss. You get the crunch, the ooze, and the sweetness right from your freezer.
- Seriously Simple to Master: Don't let the gourmet taste fool you; this is one of the easiest homemade ice creams you'll ever whip up. The base comes together in minutes, and your ice cream maker does the heavy lifting. If you can whisk, you can make this!
- Unbelievably Creamy & Dreamy Texture: Our rich, velvety ice cream base provides the perfect canvas for all the delightful mix-ins. It's smooth, luscious, and melts perfectly on your tongue, ensuring every bite is pure bliss.
- Customization is King: Love extra chocolate? Want more graham cracker crunch? Craving perfectly toasted marshmallows? This recipe is incredibly versatile. You're the chef, so feel free to adjust the ratios of your favorite s'mores components to suit your palate.
- The Ultimate Crowd-Pleaser: Kids adore it for its playful flavors, and adults are instantly transported back to their own childhood campfire memories. It's a guaranteed hit at barbecues, family gatherings, or simply as a special treat for yourself.
- A Taste of Nostalgia, Anytime: Embrace the joy of S'mores Ice Cream: Your Easy Summer Campfire Nostalgia with this fantastic recipe, bringing the beloved summer tradition into your kitchen year-round.
Honestly, the hardest part of this whole process is waiting for the ice cream to freeze to that perfect scoopable consistency. But trust us, every moment of anticipation is worth it!
The Magic Behind the Mix: Essential Ingredients for Your S'mores Ice Cream
The secret to incredible homemade ice cream lies in the quality of your ingredients. While this smores ice cream recipe is forgiving, using good quality dairy and flavorings will elevate your final product from good to unforgettable. Here’s a closer look at what you’ll need:
- Heavy Cream & Whole Milk: This dynamic duo forms the backbone of your creamy base. The high-fat content of heavy cream provides richness and prevents ice crystals, while whole milk helps achieve the perfect balance in texture. Avoid using lower-fat milks, as they can result in a icier, less satisfying ice cream.
- Granulated Sugar: Beyond sweetness, sugar plays a crucial role in the ice cream's texture, helping to lower the freezing point and keep it scoopable.
- Pure Vanilla Extract: A good quality vanilla extract enhances all the other flavors. Don't skimp here; it makes a noticeable difference.
- Graham Crackers: These are essential for that signature s'mores crunch. You'll want to crush them into coarse crumbs – not too fine, or they'll get lost. A food processor makes quick work of this, or you can place them in a zip-top bag and crush them with a rolling pin for a bit of stress relief!
- Chocolate Chips or Chunks: Whether you prefer classic milk chocolate chips, rich dark chocolate chunks, or a mix of both, choose a chocolate you genuinely enjoy eating. The quality of your chocolate will shine through. You can even chop up your favorite chocolate bar for varied textures.
- Mini Marshmallows: The star of the show! Mini marshmallows are preferred because they disperse better and maintain a pleasant chewiness when frozen. While you'll typically add these towards the end, a pro tip for an extra layer of flavor is to lightly toast some marshmallows under a broiler or with a kitchen torch before adding them. This adds a subtle smoky depth that truly mimics a campfire s'more. Just be quick, they burn fast!
Pro Tip: Ensure your ice cream maker's bowl has been frozen for at least 24 hours (or according to manufacturer instructions) before you plan to churn. A super-cold bowl is critical for preventing ice crystals and achieving a smooth, creamy texture.
Crafting Your Creamy S'mores Dream: A Step-by-Step Guide
Making this homemade smores ice cream recipe is a joyous process, much simpler than it might seem. Follow these steps for a perfectly textured, flavor-packed dessert:
1. Prepare the Ice Cream Base
- Combine Liquids and Sugar: In your largest mixing bowl, whisk together the heavy cream, whole milk, and granulated sugar. Continue whisking for a minute or two, or until the sugar is completely dissolved. You shouldn't feel any grittiness when you rub a small amount between your fingers.
- Add Vanilla: Stir in the pure vanilla extract. Give it another quick whisk to combine.
- Chill Thoroughly (The Secret Step!): This step is crucial for the best results. Place your entire liquid base mixture into the refrigerator for at least 30 minutes, or even better, 2-4 hours. A well-chilled base freezes faster in your ice cream maker, leading to a smoother, creamier final product with fewer ice crystals. If your kitchen is warm, this step is non-negotiable!
2. Churning and Integrating Mix-Ins
- Start Churning: Once your base is thoroughly chilled, pour it into your pre-frozen ice cream maker bowl and turn the machine on. Let it churn according to your machine's instructions, typically for 15-20 minutes, until the mixture resembles a thick soft-serve consistency. It should be noticeably thicker but still soft.
- Add Graham Crackers and Chocolate: During the last 5 minutes of churning, add the graham cracker crumbs and chocolate chips (or chunks) directly into the churning ice cream. The machine will work its magic, distributing these delicious bits evenly throughout the mixture.
- Fold in Marshmallows by Hand: Once the churning cycle is complete, turn off your machine. Gently remove the churning paddle and carefully transfer the soft ice cream to a freezer-safe container. Now, gently fold in the mini marshmallows by hand using a spatula. Do NOT let the machine churn the marshmallows, as they will get pulverized and disappear into the base. Folding by hand preserves their shape and chewy texture.
- Layer for Visual Appeal (Optional but Recommended): For an extra special touch, you can layer the ice cream mixture with additional graham cracker crumbs, chocolate chips, and mini marshmallows as you transfer it to the freezer container. This creates beautiful visual swirls and ensures every scoop is bursting with s'mores goodness.
3. The Waiting Game: Freezing to Perfection
- Freeze: Cover the container tightly with a lid or plastic wrap (pressing the wrap directly onto the surface of the ice cream can help prevent ice crystals). Place it in the freezer for at least 4 hours, or preferably overnight, to allow the ice cream to firm up to a scoopable consistency. This waiting period is the hardest part, but it's essential for achieving that perfect, creamy texture.
- Serve and Enjoy: When ready to serve, let the ice cream sit at room temperature for 5-10 minutes to soften slightly, making it easier to scoop. Then, dig in and savor every magical bite!
Elevating Your S'mores Ice Cream Experience
While this smores ice cream recipe is fantastic as written, there's always room for personal touches and creative flourishes to make it truly your own:
- Toasted Marshmallow Swirl: For an authentic campfire flavor, gently toast some marshmallows under a broiler (watch carefully, they brown fast!) or with a kitchen torch until lightly golden and gooey. Once cooled slightly, you can fold these into the ice cream along with the untoasted marshmallows, or even create a marshmallow swirl by drizzling melted, toasted marshmallows into the layers as you transfer it to the freezer container.
- Chocolate Drizzle: Before serving, warm up some chocolate fudge sauce or melt a bit of chocolate and drizzle it over your scoops for an extra layer of chocolatey decadence.
- Graham Cracker Crust Bottom: Press a thin layer of buttered graham cracker crumbs into the bottom of your freezer container before adding the ice cream for an extra crumbly base.
- Salted Caramel Swirl: A touch of salted caramel can beautifully complement the sweet s'mores flavors. Swirl some in as you layer the ice cream.
- Serving Suggestions: This ice cream is magnificent on its own, but it also shines in a waffle cone, alongside a brownie, or even blended into a milkshake for an extra rich treat.
Storage: Store your homemade s'mores ice cream in an airtight container in the coldest part of your freezer. For best texture and flavor, try to consume it within 1-2 weeks. After that, it might start to develop ice crystals, though it will still be delicious.
Conclusion
Making your own homemade s'mores ice cream is a truly rewarding experience. This smores ice cream recipe delivers all the beloved flavors of a campfire classic in a convenient, creamy, and utterly delicious form. It’s easy enough for beginners, yet impressive enough to wow any crowd. So, skip the campfire, grab your ice cream maker, and get ready to create a dessert that will bring smiles, evoke cherished memories, and satisfy your sweet tooth in the most magical way. Happy scooping!
